![[ flyktighet ]](http://1.bp.blogspot.com/-D6Mmi0V9Vq4/TnN4dJU_BGI/AAAAAAAAAEE/2Xd8rBrUF8s/s1600/flyktv1.png)
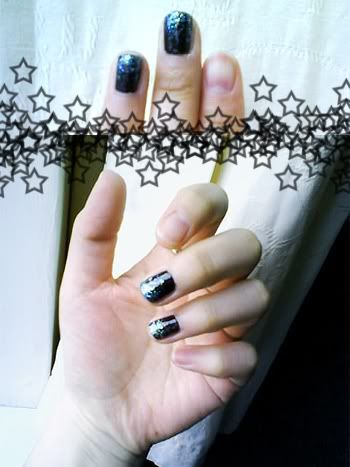
2 coats Anna Sui in black, 1/2 coat Arezia black with glitter particles, layering with Lizzie iridescent glitter in clear polish.
I promise I'll put more effort into editing in the future!! I upgraded to Photoshop CS5 recently, and it's still bare bones, meaning no custom brushes or anything.
--
In attempt to improve blog content, I've been looking extra hard at my favourite blogs, and one doable thing that stood out was photo quality. I don't have the best camera and I can't afford to upgrade to my dream Canon DSLR, so I thought about equipment instead - how about a lightbox for product reviews?
This was the guide I used, however I also found variations: using fabric or tissue paper to cover the sides, different arrangements of lighting, and one using foam boards instead of a cardboard box.
Result...
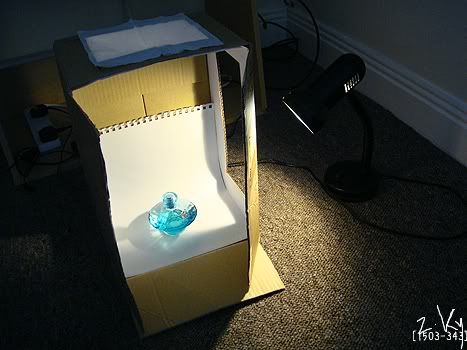
The sides are unfinished as I have no suitable material, and I laid a tissue on top for now :s
With this ghetto and incomplete setup, here's what I achieved with a bottle of Curious by Britney Spears (impromptu review: it's nice and very wearable, more floral than sweet, but it just doesn't suit me...):
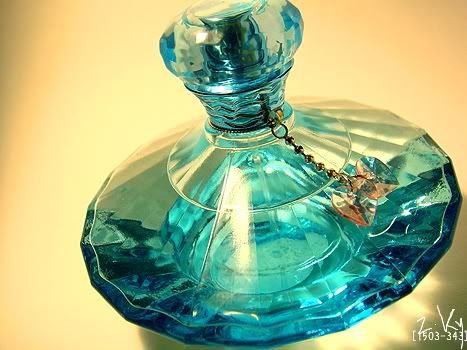
The colour turned out yellow, I think I poked the lamp through the side instead of filtering it through the tissue. There's a weird unintended yet not unwelcome vignette effect. I used my sister's Cyber-shot for these (my own DSC-T30 ran out of battery).
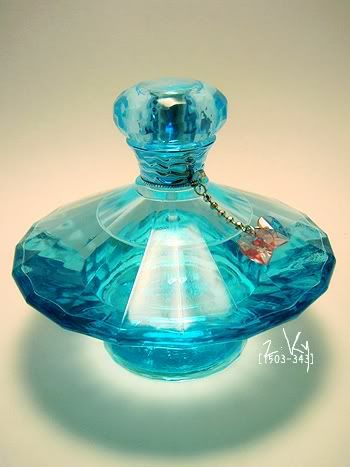
This one is much better, again there's an unintended vignette effect. More lights would be useful for getting rid of the shadow at the bottom.
Anyone have other tips regarding lightboxes and product photography?
No comments:
Post a Comment